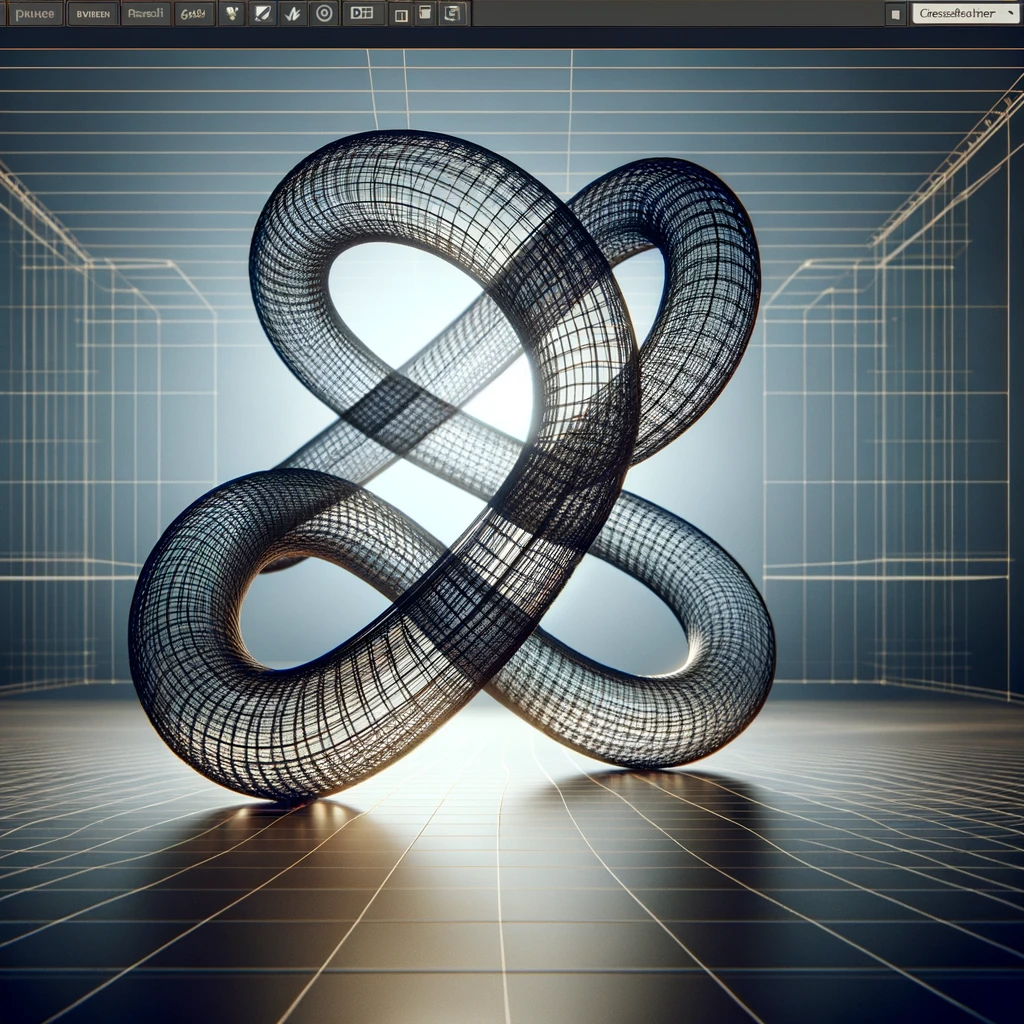
How to create an infinity coil on Rhino Grasshopper?
Creating an infinity coil or symbol (also known as a lemniscate) in Rhino Grasshopper involves a series of steps to generate the mathematical curve that represents the infinity symbol and then manipulating it to fit your specific design needs. Here’s a basic guide on how to create an infinity coil:
1. Start Rhino and Open Grasshopper: Open Rhino, and then start Grasshopper by typing Grasshopper into the Rhino command line.
2. Mathematical Equation for Infinity Symbol: The infinity symbol can be created using a parametric equation. One common representation is the Lemniscate of Bernoulli, which can be expressed in parametric form as follows:
- ( x = \frac{2a\cos(t)}{1 + \sin^2(t)} )
- ( y = \frac{a\sin(2t)}{1 + \sin^2(t)} )
- Where ( a ) is a constant that defines the size of the infinity symbol, and ( t ) is the parameter, typically ranging from 0 to 2π for a complete loop.
3. Implementing the Equation in Grasshopper:
- Expression Component: Use the
Expressioncomponent to implement the parametric equations. You’ll need twoExpressioncomponents, one for ( x ) and one for ( y ). - Parameter Component: Use a
Number Slider(orRangeandGraph Mapperfor more control) to generate the ( t ) values. Connect this slider to thetinput of bothExpressioncomponents. - Constants: Define a constant ( a ) using a
Number Sliderand connect it to bothExpressioncomponents as well. - For the ( x ) equation, the expression would be:
2*a*cos(t)/(1 + sin(t)^2). - For the ( y ) equation, the expression would be:
a*sin(2*t)/(1 + sin(t)^2).
4. Construct the Point: Use the Construct Point component to create points from the ( x ) and ( y ) outputs of the Expression components.
5. Interpolate: Use the Interpolate component to connect the points smoothly and form the curve. Connect the output of the Construct Point component to the Interpolate component.
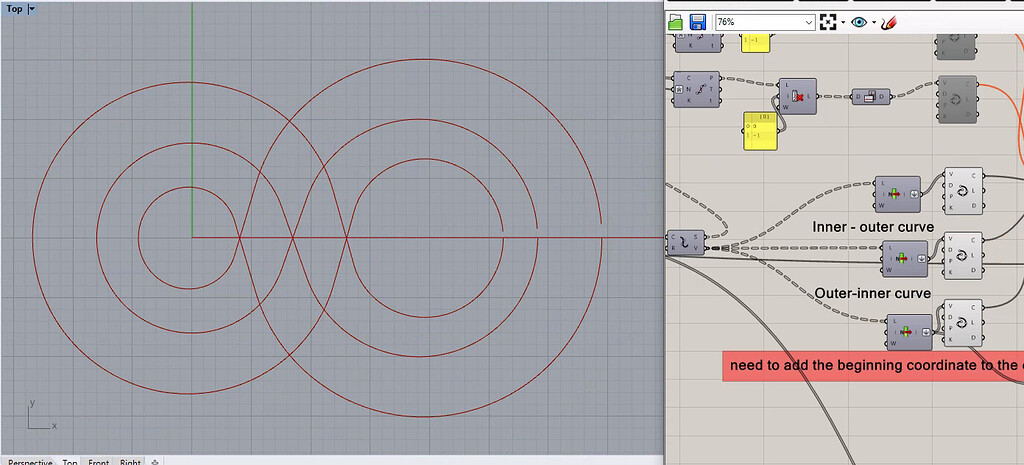
6. Adjust Parameters: Adjust the sliders for ( a ) and ( t ) to change the size and resolution of the infinity symbol. For a coil effect, you might want to extend the range of ( t ) beyond 0 to 2π and manipulate the z-coordinate in a similar parametric manner to achieve the coiling effect.
7. Preview: You should now see an infinity symbol in the Rhino viewport. Adjust the parameters as needed for your specific design requirements.
This is a basic guide to get you started. Grasshopper is a powerful tool, and there are often multiple ways to achieve a similar outcome. Experiment with different components and parameters to refine your design.
Table of Contents
Interpolate component on Rhino Grasshopper
The Interpolate component in Rhino Grasshopper is a versatile tool used to create smooth curves that pass through a specified series of points. Interpolation is fundamental in computational design for generating curves that precisely fit within a set of defined points, enabling designers to create complex geometries efficiently. Here’s how to use the Interpolate component effectively in Grasshopper:
1. Understanding the Interpolate Component
The Interpolate component can be found under the Curve tab, within the Spline category. It requires a set of input points through which the curve will pass. Optionally, you can specify parameters such as the curve’s degree, periodicity, and knot style to control the curve’s smoothness and behavior.
Basic Usage
- Input Points: The primary input for the
Interpolatecomponent is a series of points. These can be generated manually, calculated mathematically, or extracted from existing geometry. The order of these points dictates the path of the resulting curve. - Degree (Optional): The degree of the curve defines its complexity and smoothness. A higher degree allows for a smoother curve but requires more points to define its shape accurately. The default degree is 3, which is suitable for creating smooth curves without excessive complexity.
- Periodic (Optional): Setting the curve to be periodic forces it to be a closed loop, with the start and end points being smoothly connected. This is useful for creating circular or looped shapes.
- Knots (Optional): This parameter allows for the customization of the knot vector of the spline, which can affect how the curve interpolates between the points. It’s a more advanced feature and is typically left at its default setting for most applications.
2. Step-by-Step Guide
- Start Rhino and Open Grasshopper: Ensure both Rhino and Grasshopper are running.
- Place Points: Use components like
Point,Construct Point, or any other means to generate or import the points you want your curve to pass through. - Add
InterpolateComponent: Drag theInterpolatecomponent onto your Grasshopper canvas from theCurve > Splinecategory. - Connect Points to
Interpolate: Connect your points to theVerticesinput parameter of theInterpolatecomponent. - Adjust Parameters (Optional): If desired, adjust the degree, periodicity, and knots of the curve by connecting appropriate inputs to these parameters on the
Interpolatecomponent. - Preview the Curve: The output of the
Interpolatecomponent is your interpolated curve. You can preview this curve in the Rhino viewport.
Tips for Using Interpolate
- Point Order Matters: The order in which you input points into the
Interpolatecomponent significantly impacts the resulting curve’s shape. Ensure your points are in the desired sequence. - Experiment with Degrees: Try different degrees to see how they affect your curve. Lower degrees produce simpler curves, while higher degrees offer more flexibility at the cost of complexity.
- Use for Smooth Transitions: The
Interpolatecomponent is excellent for creating smooth transitions between points or segments, making it ideal for organic or flowing designs.
The Interpolate component in Grasshopper is a powerful tool for creating smooth, custom curves through a set of defined points. By understanding and utilizing its parameters, you can precisely control the shape and smoothness of your curves, enabling the creation of intricate and beautiful designs in Rhino.
How to create a periodic curve on Rhino Grasshopper?
Creating a periodic curve in Rhino Grasshopper involves using the Interpolate component with the periodic option enabled or utilizing specific components designed for creating closed curves. A periodic curve is smooth and continuous, with the start and end points seamlessly connecting to form a loop. This is especially useful in designing rings, bracelets, circular patterns, or any geometry that requires a continuous loop without visible seams.
Here’s a straightforward method to create a periodic curve using the Interpolate component:
Steps to Create a Periodic Curve:
1. Prepare Your Points:
Start by generating or defining a series of points that you want your periodic curve to pass through. These points should be arranged in the order you wish the curve to follow. Remember, for a periodic curve, the first and last points do not need to be the same, as the periodic option will ensure the curve loops smoothly.
2. Use the Interpolate Component:
Find the Interpolate component in Grasshopper (located under the Curve > Spline category). Place it onto your canvas. This component will create a smooth spline that passes through the specified points.
3. Enable Periodicity:
To make the curve periodic, you will need to set the Periodic input to True. This can be done by placing a Boolean Toggle component onto the canvas (found under Params > Input) and connecting it to the P (Periodic) the input of the Interpolate component. Double-click the toggle to set it to True.
4. Connect Your Points:
Connect your series of points to the Vertices input of the Interpolate component. The order of these points will affect the shape and flow of your curve.
5. Adjust the Curve Degree (Optional):
The Degree input of the Interpolate component allows you to control the smoothness and flexibility of the curve. Higher degrees will generally produce smoother curves but require more points to define accurately. Connect a Number Slider to the D (Degree) input if you wish to adjust this parameter.
6. Preview the Result:
The output of the Interpolate component is now a periodic curve that loops smoothly through your input points. You can preview this curve in the Rhino viewport and adjust your points or parameters as needed.
Example Scenario:
Imagine you are designing a circular pendant and need a smooth, looping curve as the base shape. By placing points around the desired boundary of the pendant and using the steps above, you can create a seamless, periodic curve that serves as an elegant foundation for further design and embellishment.
Tips:
- Point Distribution: For a smooth and evenly distributed curve, ensure that your points are well-spaced around the intended loop. Clustering too many points in one area can lead to tight bends or irregularities in the curve.
- Curve Editing: If you need to adjust the shape after creating the curve, consider using
Control Pointsto fine-tune the curve’s path without starting from scratch. - Exploring Other Components: Beyond
Interpolate, Grasshopper offers other components capable of creating periodic curves, such asNURBS Curvecomponents with periodicity options. Exploring these components can provide additional flexibility in your designs.
Creating periodic curves in Grasshopper allows for the design of complex, seamless geometries, opening up a wide range of creative possibilities in your 3D modeling projects.
Knot vector on Rhino Grasshopper
In Rhino Grasshopper, a knot vector is a fundamental concept when dealing with NURBS (Non-Uniform Rational B-Splines) curves and surfaces. It essentially defines the parameter space of the curve or surface, influencing how the control points affect the geometry. Understanding knot vectors is crucial for creating and manipulating complex shapes with precision.
What is a Knot Vector?
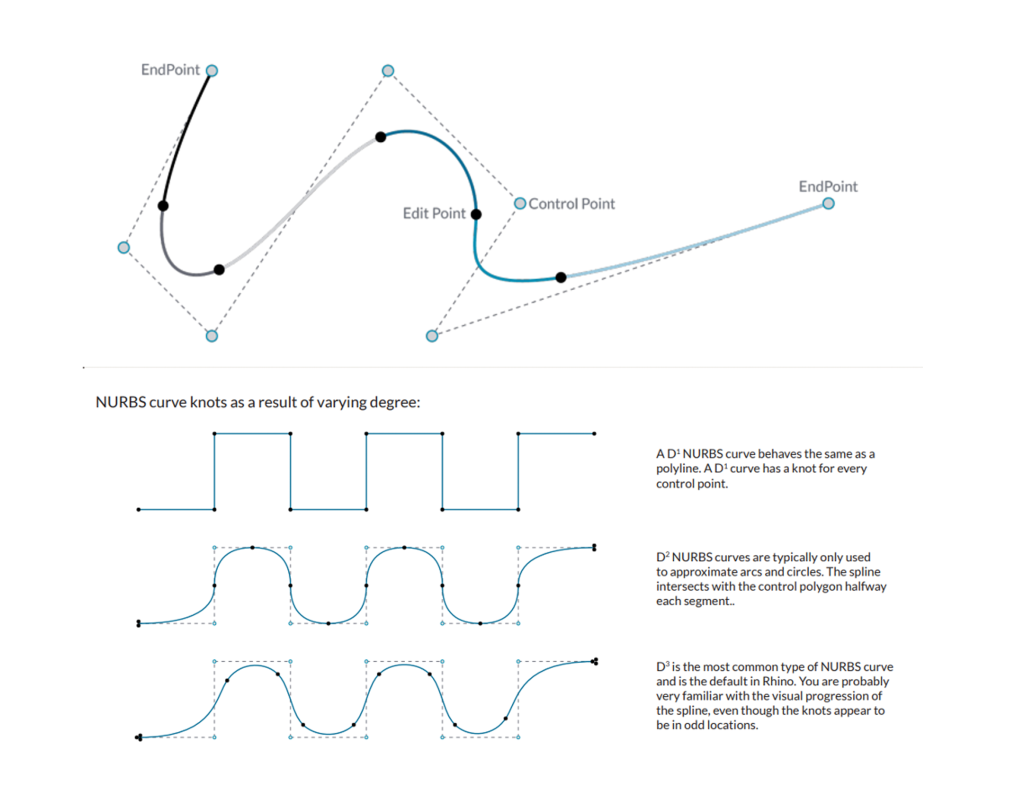
A knot vector is a sequence of parameter values that partition the domain of a NURBS curve or surface. It determines where and how the control points influence the NURBS geometry. The knot vector is “non-decreasing,” meaning its values either increase or stay the same as you move through the sequence.
Components of a Knot Vector:
- Multiplicity of Knots: The repetition of values in the knot vector. A knot’s multiplicity affects the continuity of the curve at that point. For example, a knot value repeated three times may cause the curve to touch but not necessarily pass through a control point.
- Internal Knots: These are the knots between the start and end of the knot vector. They determine the intervals over which the control points influence the curve.
- End Knots: The first and last values of the knot vector, often have higher multiplicity to ensure the curve starts and ends at the first and last control points.
How to Use a Knot Vector in Grasshopper:
Manipulating knot vectors directly in Grasshopper requires a deeper understanding of NURBS mathematics and is typically done through custom scripting components (e.g., Python or C# components) or specialized plugins.
However, you can indirectly influence knot vectors using Grasshopper’s native components by adjusting the degree of curves and the positioning of control points. Here’s a basic approach to affect the NURBS characteristics without directly manipulating the knot vector:
1. Create a NURBS Curve:
Use the Nurbs Curve component to generate a NURBS curve. This component requires control points and a degree.
2. Adjust the Degree:
The degree of the curve influences the knot vector. Higher degrees result in smoother curves but require more control points for definition. Connect a Number Slider to the degree input to experiment with different values.
3. Control Points:
The positioning and number of control points will indirectly influence how the underlying knot vector defines the curve. Use components like Construct Point or Move to generate and manipulate control points.
4. Custom Scripting for Direct Manipulation:
For direct manipulation of knot vectors, consider using a Script component (e.g., Python). Within this script, you can define custom knot vectors and apply them to NURBS curves or surfaces, offering precise control over the shape.
Example of Custom Scripting:
import Rhino.Geometry as rg

# Create a list of control points
control_points = [rg.Point3d(0, 0, 0), rg.Point3d(1, 1, 0), rg.Point3d(2, 0, 0)]
# Define a knot vector
knots = [0, 0, 0, 1, 1, 1] # This is for a quadratic curve (degree 2) with simple knots

# Create the NURBS curve
nurbs_curve = rg.NurbsCurve.Create(False, 2, control_points)
for i, knot in enumerate(knots):
    nurbs_curve.Knots[i] = knot

# The nurbs_curve can now be used in Grasshopper
While Grasshopper does not provide direct components for editing knot vectors of NURBS curves and surfaces, understanding the underlying principles allows for more informed manipulation of NURBS geometries. For advanced control, including direct knot vector manipulation, scripting within Grasshopper is a powerful approach.
NURBS Curve components on Rhino Grasshopper
In Rhino Grasshopper, NURBS (Non-Uniform Rational B-Splines) curves are essential for creating smooth, flexible curves that can accurately model complex shapes.
NURBS curves offer more control and versatility than simple polylines or arcs, making them invaluable in precision modeling, industrial design, and architecture.
Grasshopper provides several components for creating and manipulating NURBS curves, each serving different purposes in the design and modeling process.
Key NURBS Curve Components in Grasshopper:
1. NURBS Curve:
- Location: Curve > Spline > NURBS Curve
- Purpose: Creates a NURBS curve from control points with an optional specification of degrees and knots. This component is fundamental for generating custom NURBS curves, giving the user control over the curve’s shape through its control points and flexibility through its degree.
2. Interpolate (NURBS):
- Location: Curve > Spline > Interpolate
- Purpose: Generates a smooth NURBS curve that passes through a specified series of points. You can adjust the curve’s degree and specify if the curve should be closed, affecting its continuity and smoothness.
3. Control Points:
- Location: Curve > Analysis > Control Points
- Purpose: Extract the control points of a NURBS curve. This component is useful for analyzing and modifying the shape of the curve by manipulating its control points.
4. Evaluate Curve:
- Location: Curve > Analysis > Evaluate Curve
- Purpose: Computes the point on the curve at a specified parameter. This is crucial for working with NURBS curves as it allows for precise positioning and analysis along the curve.
5. Divide Curve:
- Location: Curve > Division > Divide Curve
- Purpose: Divides a curve into equal segments or at specific parameters, producing points and/or parameters that can be used for further geometric constructions or analysis.
6. Rebuild Curve:
- Location: Curve > Util > Rebuild
- Purpose: Reconstruct a curve by modifying its control point count and degree. This is particularly useful for simplifying curves or changing their detail level without significantly altering their overall shape.
7. Fit Curve:
- Location: Curve > Util > Fit Curve
- Purpose: Refits a curve to a specified tolerance, often resulting in a smoother curve with potentially fewer control points. This is useful for optimizing curves for performance or simplifying complex curves.
8. Adjust Seams:
- Location: Curve > Util > Adjust Seams
- Purpose: Moves the seam (start/end point) of a closed curve. This is helpful for aligning curves or preparing them for operations like lofting or sweeping where the seam position is critical.
Creating a Simple NURBS Curve:
To create a NURBS curve in Grasshopper:
- Place Control Points: Use the
Pointcomponent to create control points, or generate them dynamically using other components. - Define a NURBS Curve: Drag the
NURBS Curvecomponent onto the canvas and connect your control points. - Adjust Parameters: Optionally, connect sliders to the degree input to adjust the curve’s flexibility and smoothness.
Tips for Working with NURBS Curves:
- Control Point Placement: The placement of control points significantly influences the shape of the NURBS curve. Experiment with different configurations to achieve the desired curvature.
- Degree of the Curve: The degree of a NURBS curve affects its smoothness and the minimum number of control points required. A higher degree allows for smoother curves but requires more control points for definition.
- Knot Vector Customization: For advanced control, consider manipulating the knot vector through scripting components if you need specific behaviors not achievable through standard components.
NURBS curves in Grasshopper offer a powerful way to create complex, smooth geometries with precision and flexibility. Understanding these components and their applications can significantly enhance your modeling and design capabilities within Rhino Grasshopper.